Friday, August 30, 2013

Simple Tips to Extend the Life of Your Microwave

  
Cover everything you Heat or Cook
It is a necessity to cover the food or drink that you are microwaving, because hot liquid and food is what kills most microwaves. This is because the microwave starts building up particles and begins to lose value. If you ever wanted to know why this is such a big deal, you can look inside the unit where there is a small piece of fiberboard covering the right side of the unit. The fiberboard is what allows the machine to operate smoothly and effectively. In addition, if the filter is covered by food and grease, the radio waves cannot get through. This causes the machine to overheat and cook itself. Most people think it is safe to heat water, coffee or tea without a cover. Yet, this rationale is completely false. The particles in the coffee and tea can cause the microwave’s interior to fail. Finally, covering your cups and dishes can extend the life of your unit from five to ten years in one simple step!
             
Do NOT Cook Food for Long Periods of Time in the Microwave
Cooking food in the microwave is not safe in the first place. Therefore, there is no reason to cook food for an extended period of time in your microwave. Certain things like chicken and beef cannot fully cook in the microwave due to the temperature not getting hot enough to kill all the bacteria on the meat. Only an oven gets hot enough to kill the parasites and tapeworm off pork, chicken and beef.

In addition to not cooking food all the way through, the inside walls of your microwave can warp due to the extended period of time of having the microwave cooking. Most microwaves now-a-days are programmable, so if you need to heat something up for 20 minutes (for whatever reason), program it to cook for ten and rest for about five minutes. After the rest period, have it continue the rest of the cooking process. There is no reason to heat your specific food or drink on high for the whole time because once it reaches a certain point it will still heat as though it were on high. 

Cleanliness is Second to Nothing with Your Microwave
Cleaning your microwave is probably the easiest and most straightforward way of maintaining your appliance. Microwaves have little ventilation, and they do is through little vents at the top of the microwave that emit steam. If you do not clean this area, especially if you do not clean the filter, your microwave will not last more than a year. Also, clean your spills and food stains directly after they occur in your microwave. One huge problem that occurs is when there is a spill in the microwave and it is not cleaned. The microwave is then used again and the spilled still has not been removed. Needless to say, your microwave will need to be replaced shortly.

Usually you can use a mixture of vinegar and water to clean your microwave if you do not have a 409 solution or something of that kind. It takes a simple spray and a quick wipe down of the top, sides and bottom plate on the inside of your microwave to keep it lasting. Microwaves should last up to 9 years, and with these techniques, yours should as well.

Thursday, August 1, 2013

Does a Ceiling Fan Cool a Room Down


Although it cannot be measured on a thermostat, the rotating of a fan’s blades in the counter clockwise direction produces a breeze that helps create a wind chill factor throughout a room. This wind chill factor makes the room feel significantly cooler than what the thermostat will actually read. This wind chill factor can be felt by anyone in the room, and makes the room much more comfortable even though the temperature has not changed drastically at all. This saves energy due to the fact that people can set their air conditioners at a higher temperature. The money saved on their electric bill will be eminent along with helping keep our environment green by being more fuel efficient. Ceiling fans only use anywhere between 25-80 watts versus an air conditioner, which uses considerably more (around the 500-2500 watt range).

What are the appropriate steps to buying a ceiling fan?
Room Size and Ceiling Height
When choosing a ceiling fan be sure to get the correct size that is most compatible to your room. You should not purchase a fan that is obviously too big or too small for the room because it will not cool down as quickly or cool the room down too much.  
The ceiling height of your room will also determine the length of the down rod and the size of other accessories that the fan needs to operate. Ceiling fans come with a universal 8” foot ceiling rod so be wary of that. In order to ensure a quality ceiling fan, make sure you know the proper dimensions of the room you are purchasing the unit for. This will make the purchasing process go smooth and quick.

Blade Span   Room Size (Square Footage)       Room Size
29”- 36”          Under  110 square ft.                     Small
40”-48”          110 sq. ft. - 150 sq. ft.                    Medium
50”-58”          150 sq. ft. - 300 sq. ft.                    Standard
60”-72”          Over 300 sq. ft.                              Large

Ceiling Fan Performance
How well a ceiling fan will perform is dependent on the parts that make up the fan. The motor size, blade pitch, and blade construction are those parts and factors that will determine this. Big is not always best when it comes to these parts, as it is always about performance. A blade pitch is a term for the blade angle. A greater angle will equate to the ceiling fan moving more air. The blade pitch should be between 12 and 16 degrees to be at maximum efficiency. The blade construction is all about the certain kind of material the blade is made from, and will determine how well your ceiling fan will perform. They should be made of pressurized Hardwood to prevent warping, which can be a problem when purchasing fans with cheap blade construction such as particle boards.

Design of the Ceiling Fan
When you are looking for the right ceiling fan, consider the different styles and designs that will improve your home décor. Many ceiling fans come in different finishes to match virtually every household design, such as the blades, that come in different shapes, sizes, colors. Take advantage of the wide selections of fans that are offered and all different styles of fans. These include traditional, contemporary, indoor, outdoor, and energy star fans.  Lastly, make sure the style of fan you choose matches your home to add value to the design of your home.

Controls
There are three different kinds of ceiling fans available for purchase including a pull chain, hand held remote control or a wall control. Choose what control system is most convenient for you when purchasing a ceiling fan.

If in the market for a ceiling fan, call CoreCentric Solutions at 1-866-737-2244 or visit our website at www.corecentricsolutions.com for exclusive deals on new and refurbished Hunter fans


Monday, July 1, 2013

Maximize the Value of your Fitness Equipment


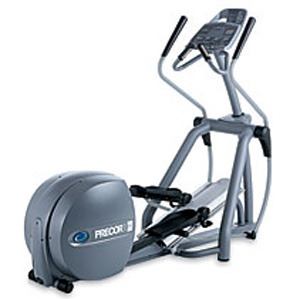
Your workout equipment is vulnerable to external factors, such as electrical wiring and connector damage. They can short out for a variety for reasons, including power surges in your electrical system. Water damage can enter your unit as well, causing an accelerated depreciation of parts that will need replacement sooner. Another problem that can occur could be the buildup of dirt and grime on vital components on your workout equipment. Stationary pieces may need to be cleaned and replaced because of the damage caused by the grime and rusting of different parts.

Your workout equipment should be a top priority just as you would prioritize your health and fitness. Once you make that investment into an expensive piece of workout equipment like a treadmill, you want to maintain that value over the life of the product. If problems arise, you do not want to have to deal with the expensive replacement of the entire machine. Therefore, replacing the part is the better option when fixing your workout equipment, saving you a ton of time and money.

Factors when Choosing Workout Equipment
The life span of your workout equipment is completely predicated on how well you take care of it. When talking in terms of treadmills, you will be paying roughly $1800-$2000 for a nice unit. These will more than likely last you anywhere from 7-10 years, but that all depends on how well you take care of the equipment.
You will also need to evaluate which brand of workout equipment you purchase. Different brands have a variation of life cycles, and you must choose your equipment wisely. Not always will the cheapest product be the best choice. Replacing parts, upkeep, and other factors such as depreciation will go into your decision of choosing the correct product. Do your research when investing in an expensive piece of workout equipment.
Replacing Worn Out Parts
The most common parts that need to be replaced on your fitness equipment include control boards, motors, and power-lifts  If your unit is not working properly, more than likely one of these parts will need to be replaced. You should refer to the troubleshooting guide in most owners’ manuals to determine what may be creating the problem. Refer to a certified technician or visit CoreCentric Solutions, Inc. at www.corecentricsolutions.com to order the proper replacement parts to keep your fitness equipment in tip top shape.


Monday, June 17, 2013

Simple Dishwasher Maintenance Tips That Will Extend the Life of Your Appliance

Dishwashers are truly a vital appliance for the common family household.  Not only is it a convenient, but sometimes a necessity. When consumers make a long-term investment they want to make sure it is quality and will last the expected useful life.

Here are 9 simple steps to help extend the life of your dishwasher:

Run an empty load with vinegar - The process is simple and it will clean germs out of your dishwasher effectively. Similarly, it will make your appliance smelling clean and brand new. The amount of vinegar that is needed is only one cup. This will clean out mold and food stuck in corners of the dishwasher. Furthermore, all the job entails is putting the cup of vinegar in the dishwasher without any dishes.  It is to be run as if it were normal cycle.

Scrap food off dishes - No one wants to clean their dishes before they are washed in the dishwasher, it's not logical. But you wouldn't want to eat a large dessert and then go play a baseball game right after. Likewise, scrap food bits off dishes before loading the machine to help reduce particles sticking to dishes as the cycle is ran. It is a task that takes a brief minute and will pay off and will allow your dishwasher to last that much longer!

Run the Hot Water before Starting - Load your dishes like normal, and then run the hot water in your kitchen sink until the water is too hot to touch. By doing this, your first cycle will be much hotter and the dishes are guaranteed to have fewer germs. Hot water is a much higher asset in a dishwasher because germs will be cleansed more efficiently.

Check Your Water Heater's Temperature - Make sure your water heater is set between 120-125 degrees consistently.  Far too many units are shipped new with lower heat. Don't be tempted to have a higher hear, or else it will cause the water to stick to dishes. Then it will cause the user to call repair services when the only conflict with the dish washer is that the temperature is either too high or too low. In summary, by doing this it will allow the appliance to last longer and satisfy the customers’ needs.

Use the Right Cycle - To make sure the dishwasher is operating correctly; make sure it is on the right setting according to the size load. You never want to put the settings on a small load, when the whole dishwasher is loaded with various cups, pans, and plates. This is one of the worst options to do, and if you want the dishwasher to have a long-term value use the right settings. Even though you may have to pay a bigger price the machine will have a longer useful life. Finally, make sure you keep soil levels together to enhance the best performance.

Don't double up on Rinse Aid - When looking to invest in a new soap for the dishwasher look to see if it includes a rinse aid feature, if it does, then there's no need to add any extra soap. It is not advised, nor, is it needed. It will do the job every time with minimal soap.

Do not Over Crowd the machine - This is an action that users do not abide by nine out of ten times they load the dishwasher. It's tempting to layer in one more bowl or plate to avoid hand washing. Consequently, it is always a pain to get all the dishes in the washer accept for one. Just remember, it's easier to wash a few dishes by hand than it is to re-run an entire load because dishes were too tightly packed. Similarly, it only takes five minutes to wash a frying pan instead of cramming the pan in the dishwasher listening to the appliance to fail.

Clean the Traps - Under the lower sprayer, there's usually a removable unit. In the unit food gets caught not allowing it to drain smoothly.  Sometimes the tray fully comes out, so it can be rinsed in the sink, and sometimes a towel is needed to remove the gunk build up. These parts should be kept clean as the lower sprayer is vital to production. If you ever have problems with your dishwasher, you can buy quality replacement parts at PartSimple.com, or send your broken part to CoreCentric Solutions for repair. This will allow you to keep the long-term investment looking brand new.

Clean You're Seals - After a few months of use, your dishwasher accumulates sticky bacteria and old food along the rubber gasket. Make sure to give the rubber gasket a brief wipe down with a damp towel to keep the dirty particles away from the dishwasher.

If for some reason your dishwasher does malfunction and you discover the control panel needs replacing look to CoreCentric Solutions for quality re-manufactured electronic boards. CoreCentric Solutions offers a cost effective alternative for appliance parts such as control boards, ice makers, and mechanical timers. Every part is 100% tested and comes with a 6-month warranty.