Friday, April 4, 2014

What exactly is the Difference between New and “Refurbished” Products?

After hearing the word “refurbished,” you think of used and worn out items that have a diminished life cycle. Words such as recycled or re-purposed pop into our heads, but this is not what manufacturers actually do with their products. Although the pricing structure is a difference of anywhere between 20-60% for a refurbished product as compared to a new product, there can be little to no difference between the 2 (and sometimes the refurbished product can even be better.)

When a customer returns a product, it cannot be sold as new due to legality issues. Whether the item is touched or untouched (such as a shelf pull), it must be marked as a refurbished item which results in a price reduction. Refurbished products will also include products that have cosmetic damage during shipping, products that have been stocked incorrectly and products that have been used as demonstrators, resulting in a drop in price.

A lot of refurbished items are actually completely reworked and shipped backed to the manufacturer for second-step refurbishment process. The product will be completely dismantled to all the materials’ original states and rebuilt to the specs of a new product. The manufacturer will then verify the unit works by putting the refurbished product through a series of tests to check its functionality. Once the product has passed the functional tests, it will be packed and shipped to refurbishment channels.

The caveat of buying refurbished products is the return and warranty process will be generally sold as is with no return policy. Refurbished products must be sold in working condition or marked with a general statement of the defects that occurred before the part was reworked. However, most manufacturers will offer a limited warranty or service contracts on the refurbished items they sell.


This is the case here at CoreCentric Solutions, Inc., where we specialize in appliance parts refurbishment as well as small appliance refurbishment. Every part we perform repairs on is done the same way each and every time, as our technicians follow detailed work instructions and processes to ensure consistency and quality. Each of our parts and products comes with a minimum of a 90 day warranty, with some even having lifetime warranties. We create value in purchasing refurbished appliance parts that can sometimes work beyond the life of a new part. Whether you are having problems with your current appliances or are looking to purchase a new ceiling fan or refrigerator, look to CoreCentric Solutions, Inc. to create value for you. 

The Value of Core

There really are no meaningful conversations about the topic of remanufacturing without diving into the subject of cores. Cores can be perceived in such different lights, and I believe many of these perceived notions about core are derived from the lack of understanding about why cores are important and how they should be understood. The need and uses of core create a unique business model for the remanufacturing industry and causes remanufacturers to analyze their business models for future success based on the supply-loops they will incur.

There are many different definitions and distinctions of core. The simplest way to describe core is a used part of any kind. Most of the time, the core is just a used part until it has been separated from its original-use form. The vague definition of what core really is explains why core has such a wide spectrum of worth and value. The same terminology is applied to a part that is pulled from an appliance only 1-hour into its duration as a part that has been in use for 3+ years. Therefore, it is important for remanufacturers to understand the worth and value of every core piece.

At CoreCentric Solutions, we understand the value and worth of each core we receive. Every core we received is logged and stored for future examination by our Engineering team. Once we figure out a process by which to repair the core part, we replace each and every failure in that part the same way and put those core parts into production. Each and every time the same noted failures are replaced 100% of the time, no matter if they are still working on the core part or not. This puts more value on CoreCentric’s core parts due to our advanced testing and remanufacturing processes. CoreCentric restores the value of core at the highest possible level, no matter where the core is in its life cycle. 
Choosing an Energy-Efficient Refrigerator

Beginning in 2014, the minimum federal efficiency standard for refrigerators will be reduced, lowering the annual energy bill for a 20-cubic-foot refrigerator to about 390 kWh. Energy Star models will use even less energy than that. These days it is fairly easy to find a full-size refrigerator that requires only 350-500 kWh per year, which is significantly less than the 1000 kWh/year refrigerators of 30+ years ago. Therefore, it is important to understand the different models and to choose an energy efficient refrigerator that best suits your needs.
First, consumers need to choose a small, simple refrigerator that does not include all the extra bells and whistles that waste energy. Think about how much space you need in a refrigerator, as going with a compact or half-sized model could be the best option for you. There are many different models, specifically by Igloo, Haier and Black & Decker that include how much kWh per year in energy they use along with the dollar amount you will spend on that refrigerator in energy per year (see below, example of Black & Decker BCE46B Energy Guide).


With all that being said, it may be better to choose a newer model refrigerator. Newer models will be more energy-efficient and will save you money over the course of the year.
The next fine point to pay attention to is the Energy Star qualification. If you choose an energy star qualified refrigerator, that will save you roughly $30-$40 over the course of one year on your energy bill alone. Many newer models have the Energy Star qualification, and can be seen on the description or model plate of the unit.
Lastly, explore your options. Evaluate the comparison between energy usage and the size of the unit that you want. Try and find something that will meet both your needs before settling with one or the other. In most cases, you will be able to balance the cost of energy usage per year with the model that you want.
CoreCentric Solutions has a variety of compact and full-sized refrigerator options that can fit your needs. Our unique grading system allows you to not only save money by purchasing a 100% functional, refurbished model, but each model includes a label that explains how energy-efficient the unit is. For more information on purchasing or seeing our inventory, please visit http://www.corecentricsolutions.com/published/closeoutliquidations.
Maximize the Value of your Fitness Equipment
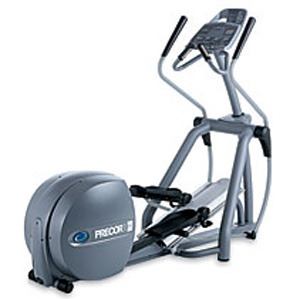
Your workout equipment should be a top priority just as you would prioritize your health and fitness. Once you make that investment into an expensive piece of workout equipment like a treadmill, you want to maintain that value over the life of the product. If problems arise, you do not want to have to deal with the expensive replacement of the entire machine. Therefore, replacing the part is the better option when fixing your workout equipment, thus saving you a ton of time and money.

Factors when Choosing Workout Equipment
The life span of your workout equipment is completely predicated on how well you take care of it. When talking in terms of treadmills, you will be paying roughly $1800-$2000 for a nice unit. This will more than likely last you anywhere from 7-10 years, but that all depends on how well you take care of the equipment.
Your workout equipment is vulnerable to external factors, such as electrical wiring and connectors. They can short out for a variety for reasons, including power surges in your electrical system. Water damage can enter your unit as well, causing an accelerated depreciation of parts that will need replacement sooner. Another problem that can occur could be the buildup of dirt and grime on vital components on your workout equipment. Stationary pieces may need to be cleaned and replaced because of the damage caused by the grime and rusting of different parts.
You will also need to evaluate which brand of workout equipment you purchase. Different brands have a variation of life cycles, and you must choose your equipment wisely. Not always will the cheapest product be the best choice. Replacing parts, upkeep, and other factors such as depreciation will go into your decision of choosing the correct product. Do your research when investing in an expensive piece of workout equipment.

Replacing Worn Out and Depreciated Parts
In some circumstances, your machine begins to show signs of malfunctioning, damaging, and accelerating depreciation. Now you have the decision of either replacing the broken part with new or remanufactured parts or spending another $1800-$2000 to invest in a whole new piece of equipment. You can look to CoreCentric Solutions, Inc. to buy parts that are very cost effective. It is not necessary to spend your money for a brand new unit when there are still plenty of years left on your current piece of equipment. Through a quality supplier, you can access a wide selection of parts that will make your treadmill running smoothly once again.


Replacement parts include consoles, control boards, power lifts, and other small parts that operate your treadmill effectively. If you have any questions with what part you need to have replaced, you can look in your owner’s manual to find the part number. There are also great tips to save you money on your long-term investment.  If you have any other questions about your unit, you can contact your supplier for more details on your machine or installation details. 
How to Prevent a House Fire 
An overwhelming number of fires occur in the home. There are time-tested ways to prevent and survive a fire. (1) In 2009, 85% of all fire deaths occurred in a house fire.  More than 3,500 Americans die each year in fires and approximately 18,300 are injured. Don’t be one of these statistics and plan ahead to these tragedies.
Here are a few easy steps to prevent fires:

Smoke Detectors- To ensure complete safety every home should have at least two or more operational smoke detectors; preferably one on every floor of the home.  Your alarm should be checked to make sure it works once or twice a month.  To test the smoke detector you press the small red button on the device for about three seconds and if it beeps that shows that it works, if it does not that means the detector needs new batteries or is broken. In addition, your smoke detector should be mounted on your ceiling. 
Mounting Instructions:
Measure the distance between the mounting holes on the back of the mounting bracket.
Mark the same distance on your chosen location.
Drill small holes at the marks.
Attach the mounting bracket to the surface with the screws
Mount the rest of the detector into the bracket.

Prevention of Electrical Fires- Never use multiple cords in the same outlet, because the circuit could spark, which is a fire hazard.  Likewise, if you use many cords in the same outlet, it could allow the unit to overheat, which once again could start a fire.  Similarly, do not set cords and wires under rugs, clothes, furniture, etc. When you leave the household unplug lamps, cords, etc… not only is it a fire hazard, but it will lower electrical bill.

Use Appliances Wisely-When you operate an appliance make sure you understand how to operate it. If you do not understand how to operate it, use the instructor’s manual to ensure personal safety.  In addition, if you have small children use safety caps on the outlets when they are not being used. Lastly, make sure that you do not turn the heat up on high or leave appliances on when you are not home. Nonetheless, make sure flames on stoves are tame and not out of control. You always need to be present while appliances are in use….

Alternate Heaters-
·         Keep fire in the fireplace. Use fire screens and have your chimney cleaned annually.
·         Kerosene heaters should be used only when approved by authorities. Never use gasoline or camp-stove fuel.
·         When you use gas grills try to avoid using starter fluid

Have a Fire Extinguisher on hand-
·         Every home should have a fire extinguisher in a specific location to avoid fires
·         Fires happen abruptly and spread out of control fast, so never underestimate the smallest fire or fire risk.
·         Check and make sure the extinguisher works annually to protect yourself in case of emergencies.  Examples of convenient places to keep a fire extinguisher include your kitchen, family room, dining room, pantry, etc...

Plan Your Escape-
·         Practice an escape plan from every room in the house.
·         Notify everyone to stay low when escaping from the fire….
·         Never open doors that are hot.
If you have any problems call your local fire department, do not hesitate because your life could be in jeopardy. In final analysis, here are a few brief steps to verify the safety, and awareness of fire safety to homeowners.


***We encourage you to have your Fire Departments phone number saved in your phone in case of emergency***

Friday, August 30, 2013

Simple Tips to Extend the Life of Your Microwave

  
Cover everything you Heat or Cook
It is a necessity to cover the food or drink that you are microwaving, because hot liquid and food is what kills most microwaves. This is because the microwave starts building up particles and begins to lose value. If you ever wanted to know why this is such a big deal, you can look inside the unit where there is a small piece of fiberboard covering the right side of the unit. The fiberboard is what allows the machine to operate smoothly and effectively. In addition, if the filter is covered by food and grease, the radio waves cannot get through. This causes the machine to overheat and cook itself. Most people think it is safe to heat water, coffee or tea without a cover. Yet, this rationale is completely false. The particles in the coffee and tea can cause the microwave’s interior to fail. Finally, covering your cups and dishes can extend the life of your unit from five to ten years in one simple step!
             
Do NOT Cook Food for Long Periods of Time in the Microwave
Cooking food in the microwave is not safe in the first place. Therefore, there is no reason to cook food for an extended period of time in your microwave. Certain things like chicken and beef cannot fully cook in the microwave due to the temperature not getting hot enough to kill all the bacteria on the meat. Only an oven gets hot enough to kill the parasites and tapeworm off pork, chicken and beef.

In addition to not cooking food all the way through, the inside walls of your microwave can warp due to the extended period of time of having the microwave cooking. Most microwaves now-a-days are programmable, so if you need to heat something up for 20 minutes (for whatever reason), program it to cook for ten and rest for about five minutes. After the rest period, have it continue the rest of the cooking process. There is no reason to heat your specific food or drink on high for the whole time because once it reaches a certain point it will still heat as though it were on high. 

Cleanliness is Second to Nothing with Your Microwave
Cleaning your microwave is probably the easiest and most straightforward way of maintaining your appliance. Microwaves have little ventilation, and they do is through little vents at the top of the microwave that emit steam. If you do not clean this area, especially if you do not clean the filter, your microwave will not last more than a year. Also, clean your spills and food stains directly after they occur in your microwave. One huge problem that occurs is when there is a spill in the microwave and it is not cleaned. The microwave is then used again and the spilled still has not been removed. Needless to say, your microwave will need to be replaced shortly.

Usually you can use a mixture of vinegar and water to clean your microwave if you do not have a 409 solution or something of that kind. It takes a simple spray and a quick wipe down of the top, sides and bottom plate on the inside of your microwave to keep it lasting. Microwaves should last up to 9 years, and with these techniques, yours should as well.


Thursday, August 1, 2013

Does a Ceiling Fan Cool a Room Down


Although it cannot be measured on a thermostat, the rotating of a fan’s blades in the counter clockwise direction produces a breeze that helps create a wind chill factor throughout a room. This wind chill factor makes the room feel significantly cooler than what the thermostat will actually read. This wind chill factor can be felt by anyone in the room, and makes the room much more comfortable even though the temperature has not changed drastically at all. This saves energy due to the fact that people can set their air conditioners at a higher temperature. The money saved on their electric bill will be eminent along with helping keep our environment green by being more fuel efficient. Ceiling fans only use anywhere between 25-80 watts versus an air conditioner, which uses considerably more (around the 500-2500 watt range).

What are the appropriate steps to buying a ceiling fan?
Room Size and Ceiling Height
When choosing a ceiling fan be sure to get the correct size that is most compatible to your room. You should not purchase a fan that is obviously too big or too small for the room because it will not cool down as quickly or cool the room down too much.  
The ceiling height of your room will also determine the length of the down rod and the size of other accessories that the fan needs to operate. Ceiling fans come with a universal 8” foot ceiling rod so be wary of that. In order to ensure a quality ceiling fan, make sure you know the proper dimensions of the room you are purchasing the unit for. This will make the purchasing process go smooth and quick.

Blade Span   Room Size (Square Footage)       Room Size
29”- 36”          Under  110 square ft.                     Small
40”-48”          110 sq. ft. - 150 sq. ft.                    Medium
50”-58”          150 sq. ft. - 300 sq. ft.                    Standard
60”-72”          Over 300 sq. ft.                              Large

Ceiling Fan Performance
How well a ceiling fan will perform is dependent on the parts that make up the fan. The motor size, blade pitch, and blade construction are those parts and factors that will determine this. Big is not always best when it comes to these parts, as it is always about performance. A blade pitch is a term for the blade angle. A greater angle will equate to the ceiling fan moving more air. The blade pitch should be between 12 and 16 degrees to be at maximum efficiency. The blade construction is all about the certain kind of material the blade is made from, and will determine how well your ceiling fan will perform. They should be made of pressurized Hardwood to prevent warping, which can be a problem when purchasing fans with cheap blade construction such as particle boards.

Design of the Ceiling Fan
When you are looking for the right ceiling fan, consider the different styles and designs that will improve your home décor. Many ceiling fans come in different finishes to match virtually every household design, such as the blades, that come in different shapes, sizes, colors. Take advantage of the wide selections of fans that are offered and all different styles of fans. These include traditional, contemporary, indoor, outdoor, and energy star fans.  Lastly, make sure the style of fan you choose matches your home to add value to the design of your home.

Controls
There are three different kinds of ceiling fans available for purchase including a pull chain, hand held remote control or a wall control. Choose what control system is most convenient for you when purchasing a ceiling fan.

If in the market for a ceiling fan, call CoreCentric Solutions at 1-866-737-2244 or visit our website at www.corecentricsolutions.com for exclusive deals on new and refurbished Hunter fans


Monday, July 1, 2013

Maximize the Value of your Fitness Equipment


Your workout equipment is vulnerable to external factors, such as electrical wiring and connector damage. They can short out for a variety for reasons, including power surges in your electrical system. Water damage can enter your unit as well, causing an accelerated depreciation of parts that will need replacement sooner. Another problem that can occur could be the buildup of dirt and grime on vital components on your workout equipment. Stationary pieces may need to be cleaned and replaced because of the damage caused by the grime and rusting of different parts.

Your workout equipment should be a top priority just as you would prioritize your health and fitness. Once you make that investment into an expensive piece of workout equipment like a treadmill, you want to maintain that value over the life of the product. If problems arise, you do not want to have to deal with the expensive replacement of the entire machine. Therefore, replacing the part is the better option when fixing your workout equipment, saving you a ton of time and money.

Factors when Choosing Workout Equipment
The life span of your workout equipment is completely predicated on how well you take care of it. When talking in terms of treadmills, you will be paying roughly $1800-$2000 for a nice unit. These will more than likely last you anywhere from 7-10 years, but that all depends on how well you take care of the equipment.
You will also need to evaluate which brand of workout equipment you purchase. Different brands have a variation of life cycles, and you must choose your equipment wisely. Not always will the cheapest product be the best choice. Replacing parts, upkeep, and other factors such as depreciation will go into your decision of choosing the correct product. Do your research when investing in an expensive piece of workout equipment.
Replacing Worn Out Parts
The most common parts that need to be replaced on your fitness equipment include control boards, motors, and power-lifts  If your unit is not working properly, more than likely one of these parts will need to be replaced. You should refer to the troubleshooting guide in most owners’ manuals to determine what may be creating the problem. Refer to a certified technician or visit CoreCentric Solutions, Inc. at www.corecentricsolutions.com to order the proper replacement parts to keep your fitness equipment in tip top shape.


Monday, June 17, 2013

Simple Dishwasher Maintenance Tips That Will Extend the Life of Your Appliance

Dishwashers are truly a vital appliance for the common family household.  Not only is it a convenient, but sometimes a necessity. When consumers make a long-term investment they want to make sure it is quality and will last the expected useful life.

Here are 9 simple steps to help extend the life of your dishwasher:

Run an empty load with vinegar - The process is simple and it will clean germs out of your dishwasher effectively. Similarly, it will make your appliance smelling clean and brand new. The amount of vinegar that is needed is only one cup. This will clean out mold and food stuck in corners of the dishwasher. Furthermore, all the job entails is putting the cup of vinegar in the dishwasher without any dishes.  It is to be run as if it were normal cycle.

Scrap food off dishes - No one wants to clean their dishes before they are washed in the dishwasher, it's not logical. But you wouldn't want to eat a large dessert and then go play a baseball game right after. Likewise, scrap food bits off dishes before loading the machine to help reduce particles sticking to dishes as the cycle is ran. It is a task that takes a brief minute and will pay off and will allow your dishwasher to last that much longer!

Run the Hot Water before Starting - Load your dishes like normal, and then run the hot water in your kitchen sink until the water is too hot to touch. By doing this, your first cycle will be much hotter and the dishes are guaranteed to have fewer germs. Hot water is a much higher asset in a dishwasher because germs will be cleansed more efficiently.

Check Your Water Heater's Temperature - Make sure your water heater is set between 120-125 degrees consistently.  Far too many units are shipped new with lower heat. Don't be tempted to have a higher hear, or else it will cause the water to stick to dishes. Then it will cause the user to call repair services when the only conflict with the dish washer is that the temperature is either too high or too low. In summary, by doing this it will allow the appliance to last longer and satisfy the customers’ needs.

Use the Right Cycle - To make sure the dishwasher is operating correctly; make sure it is on the right setting according to the size load. You never want to put the settings on a small load, when the whole dishwasher is loaded with various cups, pans, and plates. This is one of the worst options to do, and if you want the dishwasher to have a long-term value use the right settings. Even though you may have to pay a bigger price the machine will have a longer useful life. Finally, make sure you keep soil levels together to enhance the best performance.

Don't double up on Rinse Aid - When looking to invest in a new soap for the dishwasher look to see if it includes a rinse aid feature, if it does, then there's no need to add any extra soap. It is not advised, nor, is it needed. It will do the job every time with minimal soap.

Do not Over Crowd the machine - This is an action that users do not abide by nine out of ten times they load the dishwasher. It's tempting to layer in one more bowl or plate to avoid hand washing. Consequently, it is always a pain to get all the dishes in the washer accept for one. Just remember, it's easier to wash a few dishes by hand than it is to re-run an entire load because dishes were too tightly packed. Similarly, it only takes five minutes to wash a frying pan instead of cramming the pan in the dishwasher listening to the appliance to fail.

Clean the Traps - Under the lower sprayer, there's usually a removable unit. In the unit food gets caught not allowing it to drain smoothly.  Sometimes the tray fully comes out, so it can be rinsed in the sink, and sometimes a towel is needed to remove the gunk build up. These parts should be kept clean as the lower sprayer is vital to production. If you ever have problems with your dishwasher, you can buy quality replacement parts at PartSimple.com, or send your broken part to CoreCentric Solutions for repair. This will allow you to keep the long-term investment looking brand new.

Clean You're Seals - After a few months of use, your dishwasher accumulates sticky bacteria and old food along the rubber gasket. Make sure to give the rubber gasket a brief wipe down with a damp towel to keep the dirty particles away from the dishwasher.

If for some reason your dishwasher does malfunction and you discover the control panel needs replacing look to CoreCentric Solutions for quality re-manufactured electronic boards. CoreCentric Solutions offers a cost effective alternative for appliance parts such as control boards, ice makers, and mechanical timers. Every part is 100% tested and comes with a 6-month warranty.


Wednesday, November 14, 2012

How To Care For Your Refrigerator/Freezer


We often take our refrigerators for granted although the seemingly magic, cooling machine is a fairly recent invention. Less than a hundred years ago, we were still using ice boxes to cool our pickles and drinks. Additionally, up until 1990, refrigerators used the synthetic chemical Freon-12, but since Freon-12 damaged the Ozone, it was replaced with the less harmful chemical, R-134a. Enough with the history lesson, here are a few more tips to make your fridge do the most for you. See our previous post on fridge temperature for even more information.

1.      Use a Coil Cleaning Brush

We already talked about condenser coils, but here is some extra information on what they are and how to clean them. The condenser coils cool the refrigerant (the previously mentioned chemical, r-134a), which in turn cools the Fridge. The fan cools the condenser coils (not all fridges have a fan), so if any of these parts are dirty, than they will not release heat or function as well as they should. Using a coil brush, which you can buy for an economical $5, Scrub and vacuum the condenser coils. You may have to remove a grate or pull out your fridge to access the coils. Remember to unplug your Fridge before doing any kind of work, even if you are just brushing the dirty coils.

2.      Space Check

Freezers get crowded. Sometimes you just can’t eat the ice-cream as fast as you buy it. A full freezer is more effective at keeping cool than an empty one, but, when things get too cramped and crowded, the air circulation diminishes. When food starts to pile up around the vents, then the air return will become clogged and use more energy to achieve less. Try to find the right balance between overstuffed and under packed.

3.      Use an odor reducer

There are a few things that can help out with that old fridge smell. The better known one is to keep an open container of baking soda in the back of the fridge, but a few lesser known ones are a few charcoal briquettes, a bag of coffee grinds, which masks instead of removes the smell, or a tool such as the “Fridge-It,” which is made of activated charcoal (activated meaning it reacts more easily). You can find a pack of 6 for under $20.

4.       Check your Freezer Thermometer

We talked about the Refrigerator sweet spot between 35° and 38° Fahrenheit and but your Freezer also has a sweet spot between 0° and 10° Fahrenheit, so you should match your settings accordingly. You may have an air baffle in addition to your temperature controls. The air baffle helps control the temperature and will make the freezer colder if closed.

Is your refrigerator, freezer, or ice maker not working at all? If you cannot diagnose the problem you may need to have a repair technician come take a look. Choosing the Right Appliance Repair Technician is important to ensure your appliance gets back to running in tip-top shape.

Occasionally, refrigerators will need to have their control board replaced. If the refrigerator part is no longer available for purchase, try CoreCentric Solutions’ Return for Repair service to breathe new life back into your old appliance! Our fast turnaround time of 24-48 hours gets your appliance back working again in no time and saves you the hassle of purchasing a new refrigerator. Call 1866-737-2244 for more information on our Return for Repair service.

Wednesday, October 24, 2012

Recycle Your Old Electronic and more


Each year, Americans throw out 3 million tons of electronic waste, more than any other country. Most of this waste ends up in landfills and incinerators. These traditional methods of waste disposal have one big flaw: they release their contents into the environment. Landfills produce leachate, a mixture of rainwater and dissolved waste. Incinerators burn their waste, releasing harmful gasses and particulates.

These methods of waste disposal are especially dangerous when electronic waste is among the trash. Circuit boards, batteries, bulbs and motors contain harmful toxins and carcinogens. For example, the control board in your major appliance might contain Mercury, Lead, Cadmium, or Beryllium Oxide. When these boards are thrown out, these harmful substances make their way into the environment as leachate and smog. There has to be another way!

The excellent phrase, “One man’s trash is another man’s treasure” holds true here. Most of the components found in electronic waste are recyclable! Because of the high demand for electronics in general, recycled materials are used by many manufacturers. In addition, some companies, like CoreCentric Solutions, recycle the whole control board.

Recycling old electronics helps the environment and the economy. Instead of tossing your old appliance parts in the trash, Think Green and recycle. It’s easy! Just take your old part to one of our many recycling centers. You can find a list of appliance part recycling locations here.

Saturday October 27, 2012 CoreCentric Solutions is sponsoring a Recycling Extravaganza at their main facilities at 175 Wall St, Glendale Heights, IL. Here from 9 am thru 1 pm you can drop off your electronics, light bulbs, powertools and more to recycle. There will even be a free secure paper shredding service available. For more info visit http://www.corecentricsolutions.com/published/recyclingevent.

When it’s time to buy another part, Think Green and buy remanufactured parts. These components are made to meet or exceed OEM standards and even come with a warranty. You can find hundreds of these parts and more information here.

Friday, September 21, 2012

Finding an Appliance Part Number


So your appliance is broken. What now? Fixing it is almost always better than buying a new one, because it can save you money and save that appliance from the landfill. If you can identify which part is faulty, then dealing with that individual part is the best solution. Whether you buy a part directly from the Original Equipment Manufacturer (OEM), buy a remanufactured part (often the more economical option) from a company such as CoreCentric Solutions, or use a repair service such as CoreCentric’s Return for Repair (RFR) service, you will need to know the part number beforehand.

There are a lot of numbers on every board. There are labels for individual components, date codes, part revisions, and different numbering systems for each manufacturer as well as within the manufacturer itself. Unfortunately there is no standard, so you are going to have to do some troubleshooting, and work off of these guidelines to find the right digits.

1.      Look for labels not directly printed onto the board. 


A good clue for finding a part number is if it is on the label. You can also see in this example that the label says, “GEA Part No.” so the part number (also called a control number) should be fairly easy to find.

2.      Avoid the date code. One of the most common errors for the novice part number finder is to mistake the date code for the part number. For the part pictured above, the part number is easily laid out, but for other parts, there will be no indication as to which number is which function. Date codes are often shorter, and may have certain letters and number standing in for years or months. The format of the date codes can change depending on the manufacturer.

3.      Identify Patterns – Try to find similarities between these part numbers and the numbers on your board.

            Bosch        -    486752 -> 6 digits
16-10-623 -> 2 digits – 2 digits – 3 digits

Frigidaire -     5303272309 -> 9 or 10 digits

GE              -    WB27T10611 -> Often starts with W and another letter, eg: WB, Wh, WE, WR, etc.    
                        336282 -> 6-7 digits

Whirlpool -    6610269 -> 7 digits

These are just a few examples. Your board might have a different numbering system altogether.

4.      If you find that your online search for the part number comes up empty, then you may have the wrong number or your part might be no longer available (NLA). If you think that your part is NLA, consider using CoreCentric Solutions’ Return for Repair service. You can search your part number on the Return for Repair price list and have CoreCentric Solutions repair your part in only 2-4 business days. 

Tuesday, August 28, 2012

Water Saving Tips


Water is on a lot of people’s minds (and makes up most of our body!). Our lives depend on hydration, and we use water for washing, cleaning, cooking, cooling, waste disposal, and more every day.

You may have heard the standard tips for water conservation, such as taking shorter showers and turning off the water while you brush your teeth, but here are a few extra suggestions of home upgrades that will really make a difference for your water consumption and water bill.

1.      Install a Faucet Aerator
A faucet aerator attaches to the end sink or bathroom tap and helps reduce water usage by spreading the water flow from one big stream into many little water droplets. Modern indoor water faucets are likely to have built-in aerators, but if you have an older model, attaching an aerator can instantly save water and money. They are economical too and you can find them easily online or at your local home depot for under $10.

2.      Install a water efficient shower head
In 1992, the Government regulated shower heads to have a flow rate less than 2.5 gallons per minute. This created a generation of more efficient shower heads, saving as much as 12 gallons per 5 minute shower. If you multiply that by your daily morning shower, that is more than 4,000 gallons per year. If you still have the old faithful showerhead, it might be time to swap it out for one that uses less water. Don’t throw the old one away however because you won’t be able to find another showerhead with the same amount of gallons per minute if you can’t stand the newer models.

3.      Use an air-cooled ice maker (instead of a water cooled icemaker)
Most water cooled icemakers use a once-through cooling system. The water used to cool the machine is used once and then disposed. This process uses a lot of water, and if you do not want to buy a closed-loop water-cooling system, which tend to be a lot more expensive, then you are best off looking for an air-cooled machine. These machines generally use more energy and produce more heat, but with much less impact than the waste and bills of the water-cooling models,

4.      Look for the EPA WaterSense label.
The environmental protection agency has developed a program that identifies and backs products that use less water without losing performance. If you are thinking of buying anything from a toilet, to a showerhead, to an irrigation controller, finding one with the WaterSense label will be to your benefit. Find out more here.

5.      Use an efficient washing machine that offers load and cycle adjustment
Washing machines use up a lot of water and energy. High-efficiency machines can cut both of these by as much as fifty percent. If you combine this with the option for adjustable settings so that you use the right amount of water for the right amount of clothing, then you will find an immediate reduction of your water use.

Another reason that your washing machine or other appliance may be using excessive amounts of water or energy is if it is not working correctly. If you diagnose the problem, and believe that your control board is causing the trouble, then CoreCentric Solutions has the economical answer. We provide remanufacturing services on electronic controls for all major brand appliances. Each of our remanufactured controls are fully analyzed and tested with quality equal to or better than any OEM part. Each control comes with a worry free 6 month performance guarantee.